Subnets
A subnet is a range of IP addresses in your VPC. You can launch AWS resources into a specified subnet. Public subnets are for resources that must be connected to the internet, and private subnets for resources that won't be exposed to the internet.
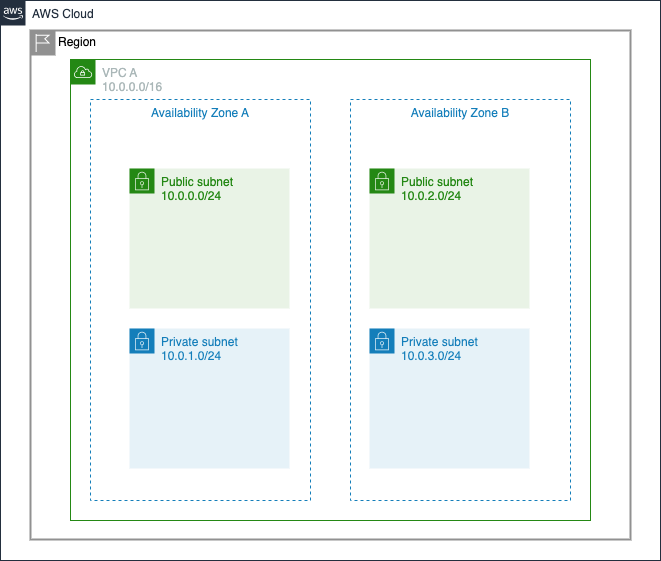
In this section we will create two public and two private subnets in each of two availability zones within your VPC.
-
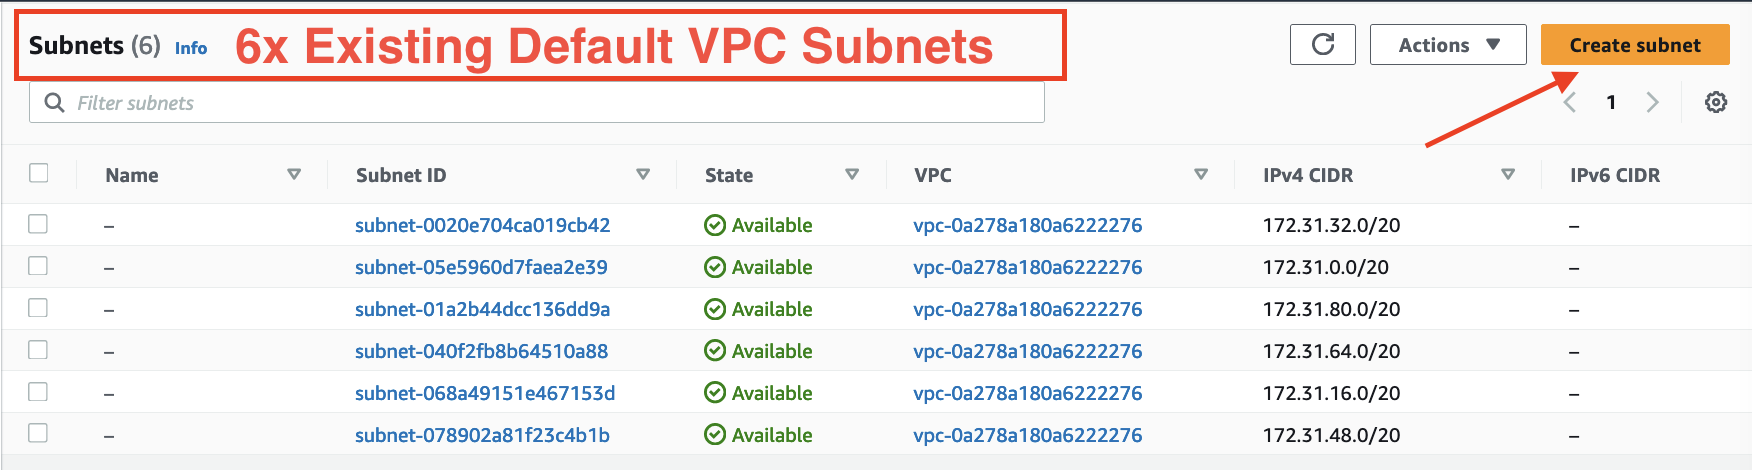
In the VPC panel on the left click on Subnets
-
Click on Create subnet button in the top right corner. There might be existing subnets if there is a default VPC already.
-
Choose
VPC Afrom the VPC ID dropdown.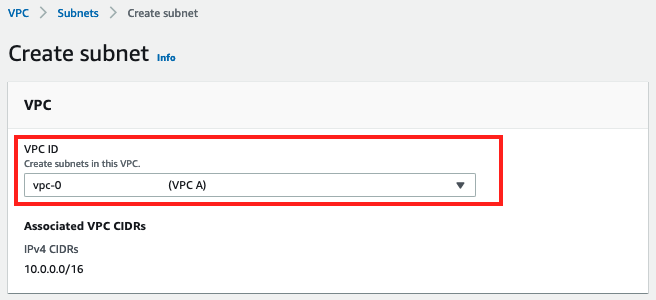
-
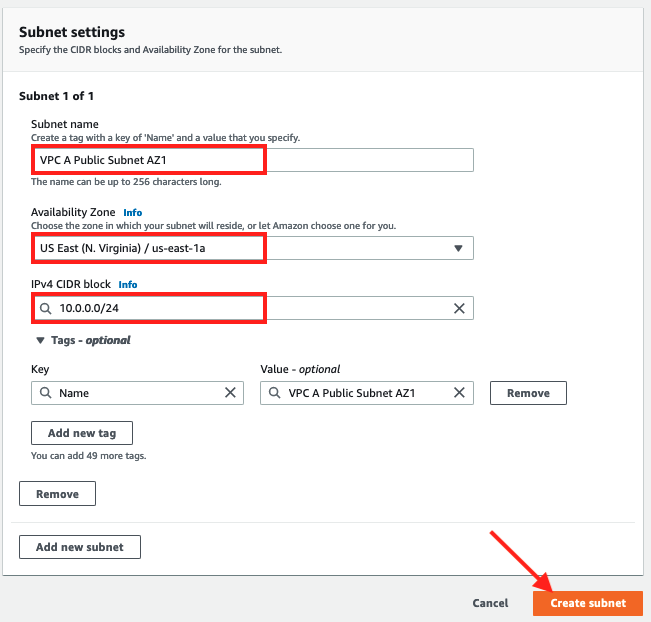
In the Subnet settings section
- Enter the name as
VPC A Public Subnet AZ1 - Select the Availablity Zone of
us-east-1a - Enter a CIDR block of
10.0.0.0/24: - Click Create subnet
- Enter the name as
-
You should have a new subnet listed under Subnets.

-
Click on Create subnet again
-
Under Subnet settings
- Select
VPC A - Enter a name of
VPC A Private Subnet AZ1 - Select the Availablity Zone of
us-east-1a - Enter a CIDR block of
10.0.1.0/24 - Click Create subnet

- Select
-
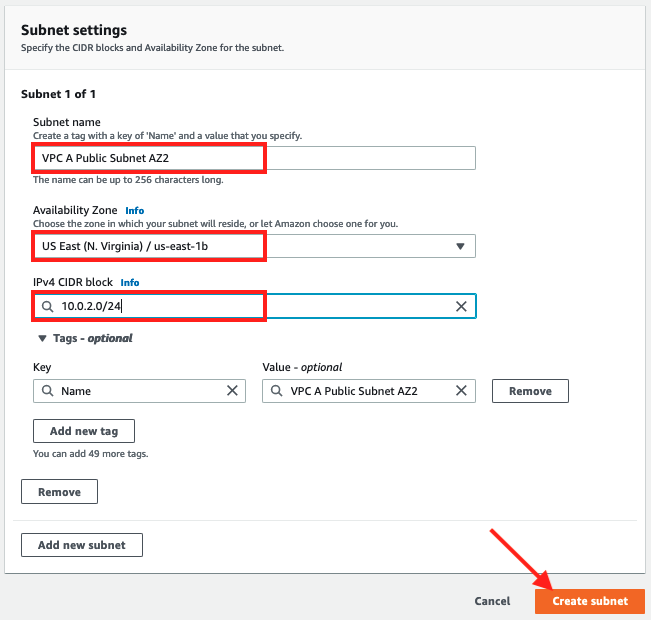
Click on Create subnet again and
- Select
VPC A - Enter a name
VPC A Public Subnet AZ2 - Select the Availablity Zone of
us-east-1b - Enter a CIDR block of
10.0.2.0/24
- Select
-
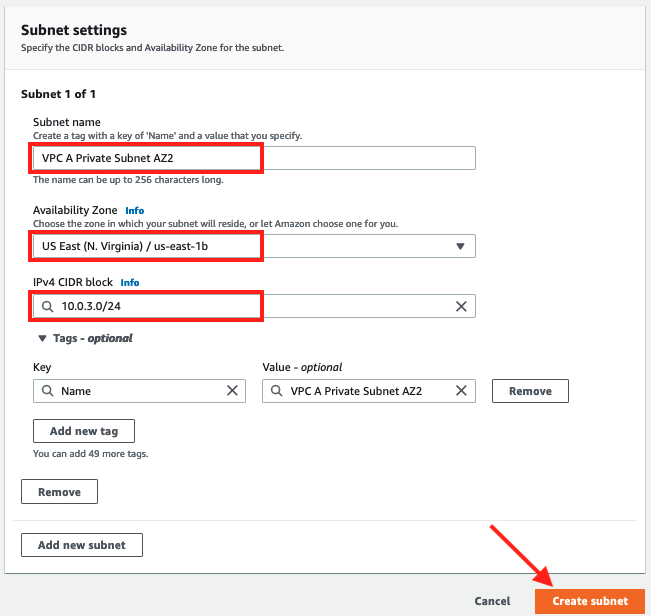
Click on Create subnet again and
- Select
VPC A - Enter a name of
VPC A Private Subnet AZ2 - Select an Availablity Zone of
us-east-1b - Enter a CIDR block of
10.0.3.0/24:
- Select
-
After you finish the task, on the resulting Subnets screen
- Clear the subnet filter
- Sort by Name
- Confirm that four new subnets are available with names, CIDR blocks and Availabilty Zones as below
